

WorkWORLD
 |
 |
||||
| Get Latest WorkWORLD |
|||||
|
|
www.workworld.org |
workworld@vcu.edu |
This topic consists of three sections that explain how to install WorkWORLD software from an installation CD. You may read them all in sequence, or jump immediately to one of them by following the links below to the sections listed:
· Starting the WorkWORLD Program
WorkWORLD is designed to install and operate properly on most personal computers sold during the past few years. You should have no problems installing it on your computer if your PC meets these minimum recommended system requirements:
· Intel Pentium processor (or equivalent)
· Windows 98 or later (see below)
· 64 MB RAM (as with all Windows applications, WorkWORLD runs better with more RAM.)
· 150 MB free hard drive space
· CD-ROM drive
· Sound Card supported by SAPI 5.1
· Internet Explorer (version 6 or later)
· Acrobat Reader (version 7 or later)
· 800x600 display resolution (see below).
WorkWORLD is a 32-bit application designed to run under the Microsoft Windows operating system. It requires Windows 98, Windows 98SE, Windows ME, Windows NT4 with SP6, Windows 2000, or Windows XP on your computer. It will not operate with Windows 3.1 or Windows 95. You should check which version of Windows runs on your computer before attempting to install WorkWORLD. You can do this easily from your desktop. Right click on the "My Computer" icon, and then choose Properties. Click the General tab and check the System area. Your system should have Windows 98 or later installed. If it does not, contact Microsoft for updated Windows files, and make certain you have them running properly before you install WorkWORLD.
NOTE: This is a single user system. Please do not attempt to install in a networked environment and make accessible by more than one user, as both calculation and program errors will occur.
At resolutions below 800x600 the WorkWORLD interface becomes difficult to use. At a display resolution of 640x480 only one case column can be displayed while answering a question. This will impair your ability to see how the question was answered in other cases. Resolutions lower than 800x600 also reduce the number of questions and outputs that can be seen at the same time and make it difficult to have a useable part of a help screen visible. If your computer is only able to display a limited number of colors (256 or less), WorkWORLD will not look as good as it would with more colors (thousands, or millions) available. On many computers, you may be able to simply select a higher display resolution or deeper color palette. See the documentation that came with your computer for further information about your display adapter.
The amount of required hard disk space and RAM required cannot be stated absolutely, as it depends on how you use your computer and how many programs you have open at once. You must ensure that sufficient disk space remains after installation so that Windows has enough space to operate its swap file. If you want to utilize the World Wide Web hyperlink features of WorkWORLD, you must also ensure that you have enough RAM in your system so that both WorkWORLD and your Internet browser program have access to sufficient memory simultaneously.
The installation of WorkWORLD requires Internet Explorer (version 6 or later) to be resident on the PC. After installation, the operation of WorkWORLD requires Internet Explorer to be installed and set as the default browser. The browser is used to display some Help and Information topics, and also to display many Internet links.
NOTE: When installing on Windows NT, Windows 2000, or Windows XP systems, administrator privileges are required. WorkWORLD will NOT install without administrator privileges.
The installation procedure below shows screen captures from Windows XP. Earlier versions of Windows are similar but may appear slightly different.
1. Start Windows. If you have any application programs running, close them all before proceeding with the installation.
2. Insert the WorkWORLD CD into your CD-ROM drive.
3. If the setup program was loaded automatically because your Windows AutoRun feature was enabled, you will see the "Welcome to WorkWORLD Setup" window, and you should go to the next step (Step 4). If you do not see the "Welcome to WorkWORLD Setup" window, perform these steps:
· Click the Windows Start button:
![]()
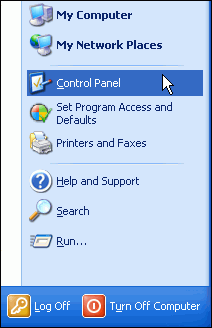
· Click on Control Panel (you may need to first select Settings on earlier Windows systems):
· Double-click Add/Remove Programs:
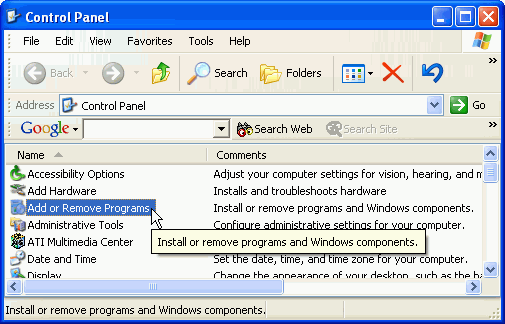
· You will see the screen below. First click on the Add New Programs button on the left side, then click the CD or Floppy button to start the Windows installation procedure:

· You will see the screen below:
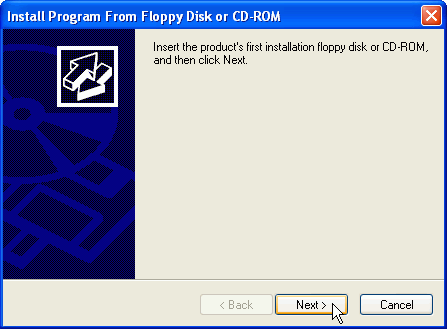
· Follow the on-screen instructions. With the CD in the drive, click the Next> button and Windows will search for the setup program on it. You will see the next screen:
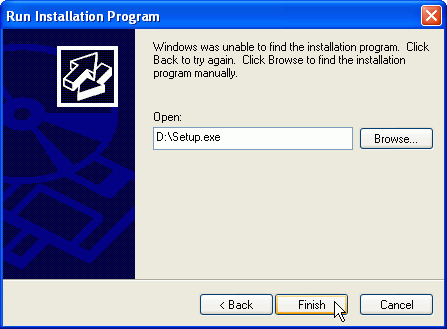
· The first letter of the command line shown should match the drive you put the installation disk in. Click the Finish button to start the WorkWORLD setup program wizard, and see its screen:
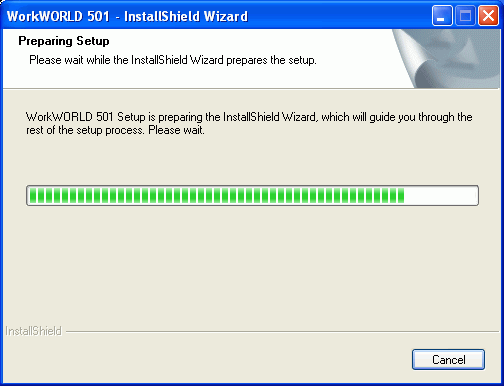
· If your system does not already have a Windows Installer Engine loaded, the WorkWORLD installation wizard will install one on your machine automatically. This piece of software is necessary to load the rest of WorkWORLD on your computer.
4. Now you can see the first actual WorkWORLD setup screen. It says "Welcome to the InstallShield Wizard for WorkWORLD":
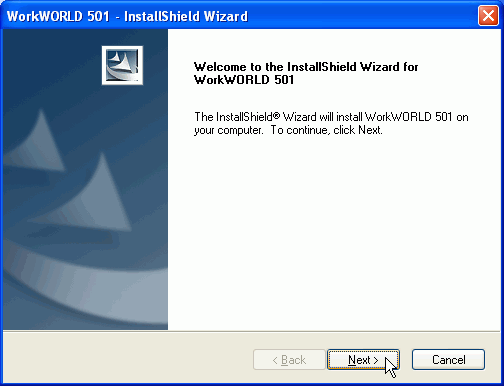
· If you want to stop the install process at any point, you may do so from any screen by clicking the Cancel button.
· To continue the installation process, click the Next> button.
5. Now you see the License Agreement screen:
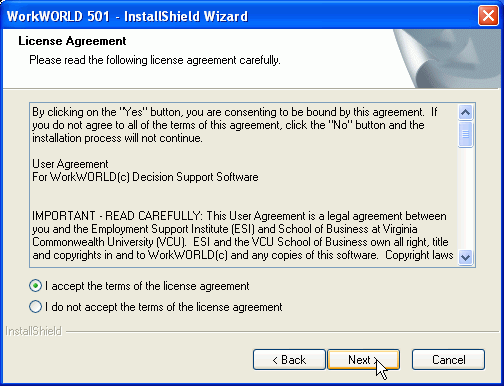
· You must agree to the terms to continue the installation by clicking the radio button next to "I accept the terms of the license agreement".
· Click the Next> button to continue.
6. On the next screen, space is provided for you to enter Customer Information:
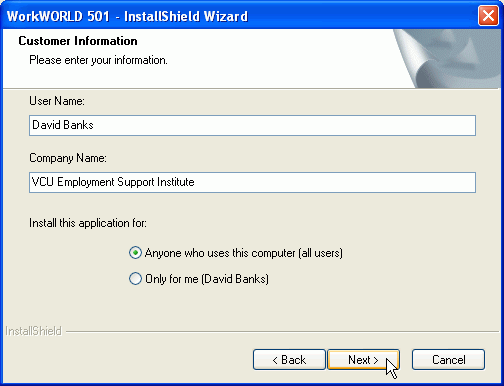
· Enter your name and company or organization name. You may see default names already entered if they exist in your computer's registry.
· If you are installing on a multi-user computer, choose whether to make WorkWORLD available to all users or not.
· To continue, click the Next> button.
7. The Choose Destination Location For Program Files screen will be displayed next:
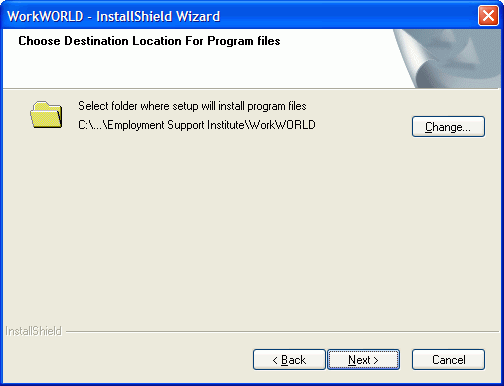
· This folder is where the actual program software files will be located on your computer system.
· You should ordinarily accept the default destination folder unless you have an overriding technical need to change it. There is normally no need to do so.
· Click the Next> button to continue.
8. The Choose Destination Location For Application Data screen will be displayed next:
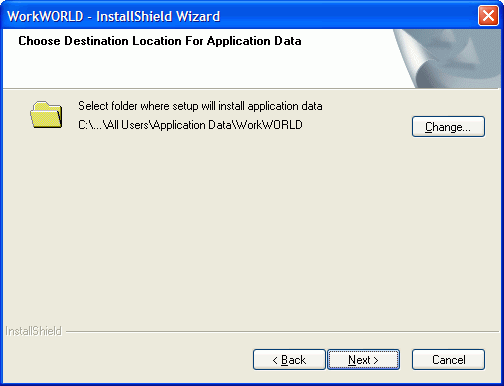
· This folder is where data files used by the program will be located on your computer system.
· You should ordinarily accept the default destination folder unless you have an overriding technical need to change it. There is normally no need to do so.
· Click the Next> button to continue.
9. The Start Copying Files window displays. This window allows you to review the settings you previously entered:
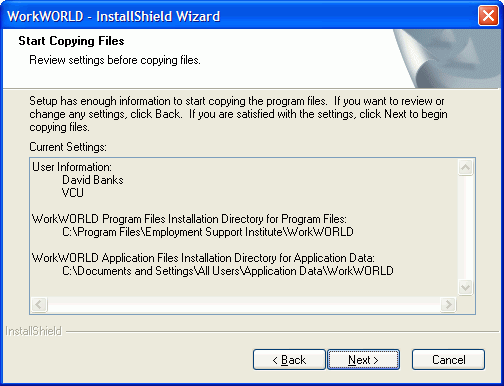
· If you want to change a previous entry, click the <Back button to cycle back to the screen with the setting you want to change.
· When you are satisfied with the current settings, click the Next> button to actually start copying files onto your computer.
10. The Setup Status windows shows you a graphic depiction of progress being made during the actual installation of files:
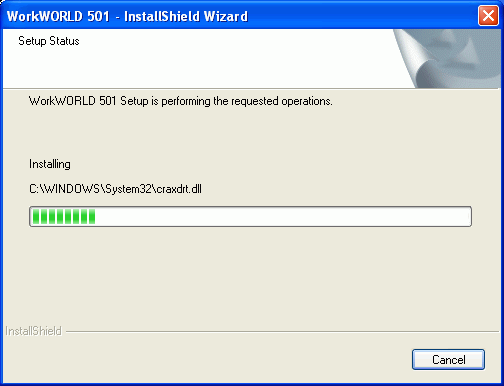
· Additionally, the file names of processed files are displayed. Be patient, the process may take some time. It is dependent on the speed of your computer system.
11. When all files have been loaded, you will see the InstallShield Wizard Complete screen:
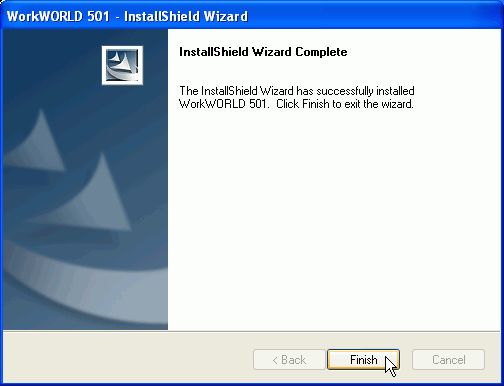
· Under some circumstances you will be prompted to reboot your computer before you are able to use the WorkWORLD software. This is dependent on the previous configuration of your computer, and what programs were previously installed on it.
· Click the Finish button to exit the Wizard.
You will find WorkWORLD on your Programs Menu. Click your Windows Start button, select All Programs, then the WorkWORLD folder. A submenu allows you to start either the complete program or just the Help Information system. From the submenu, click on WorkWORLD to start the program:

WorkWORLD icons will also be placed on your desktop during install. You can start either the entire program or just the Help Information System by clicking on them:

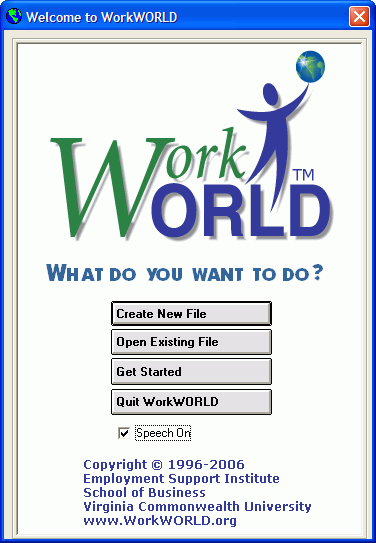
When you use either method above to start the program, the opening WorkWORLD splash screen will appear:
WorkWORLD™ Help/Information System
![]() Share/Save: Click the button or link at left to select your favorite bookmark service and add this page.
Share/Save: Click the button or link at left to select your favorite bookmark service and add this page.
This is one topic from the thousands available in the WorkWORLD™ software Help/Information System.
Complete information about the software is available at: http://www.WorkWORLD.org
See How to Get WorkWORLD page at: http://www.WorkWORLD.org/howtogetWW.html
NOTE: Sponsored links and commercial advertisements help make the WorkWORLD™ website possible by partially defraying its operating and maintenance expenses. No endorsement of these or any related commercial products or services is intended or implied by the Employment Support Institute or any of its partners. ESI and its partners take no responsibility for, and exercise no control over, any of these advertisements or their views or contents, and do not vouch for the accuracy of the information contained in them. Readers are cautioned to verify all information obtained from these advertisements prior to taking any actions based upon them. The installed WorkWORLD software does not contain advertisements of any kind.
Copyright © 1996, 1997, 1998, 1999, 2000, 2001, 2002, 2003, 2004, 2005, 2006, 2007, 2008, 2009, 2010, 2011, 2012, Virginia Commonwealth University. All rights reserved.